ProVue Image Adjustments
(00:05):
We're going to take a look at the different digital image adjustments that the ProVue systems provide. So we're going to work with this camera today. This is a Pro120. It's zoomed in to about a six-millimeter lens. It's 30 frames a second 4K. You get a lot of detail, as you can see. Look at that. And the reason we're selecting this camera is that we've got a lot of dark areas here and we've got extremely bright areas over here. Now, that's usually challenging for a camera. This camera's doing a really good job with it. But we want to show you some of the enhancements that come with the system so that you can apply these to any of the ProVue cameras on the ProVue NVR.
(00:45)
So the first thing we want to do is go into setup and we go into image control right here. Now that brings us up to the cameras. So we're going to go into that particular camera. That brings us to our live-view image here. So you'll notice up at the top here, we've got the channel. So you can switch from camera to camera right here so you can make adjustments to each one. Now, if you make some adjustments following all these different options that you have here and the picture just doesn't look as good as it used to, you can just click it back to default and it'll reload the default settings and everything's good to go.
(01:20)
So let's take a look at the first option here, and we've got IR-cut mode. We'll do the dropdown here and we can see this is the night vision system. So we can tell the system whether to automatically go into night vision if the light level is too low, but we can also force a camera to stay in color mode at all times if we want to. We can also tell it to go to black-and-white mode and stay there. Now, there are situations where you may want to do that. In this particular case, it's not beneficial for us. It can be helpful if you're trying to get plates at night and things like that. So we're going to go back here and we're going to go to our auto mode and get it back to where it was.
(02:02)
Now, IR-cut delay is how long it waits before it changes to night vision mode. So right now we've got it at two seconds. So if the light level drops too low, within two seconds the night vision system will automatically turn on and we can increase it and we can decrease it, depending on if we find it's just switching on too quickly. The LED, the night vision LEDs here, we can turn them on, we can turn them off. So by doing that right there, it'll never go into night vision mode as well. We want to keep that on auto for 99% of all applications.
(02:40)
Now, we've got some lens flip, angle flip, and corridor mode. This is for you to flip and change the viewing angle of the camera. And for example, this. If when we do lens flip, it flips the picture upside down. Why would you need that? And I wondered that myself until we had a technician install about 27 cameras in a high school and he or they were dome cameras and he made the mistake of thinking up was down and down was up. So all 27 cameras, when we turned them on, looked like this. So we just went into the software and we actually turned that on and it flipped all 27 cameras to the right field of view and he didn't have to go out and spend two and a half or three hours flipping and rearranging each one of those cameras.
(03:32) Now we have angle flip here. This basically flips it on the vertical access, and kind of mirrors it. And then we've got the corridor mode here which flips it again. And then this option here, the angle trad also gives it another option to change it again, to flip it again. Now, we don't need to use any of that with this camera, so we're going to go ahead and turn that stuff back off.
(04:01)
Now, backlighting is used if you've got dark spots, dark areas where you've got extreme light, and extremely dark. You can enable that and then you've got a light level here that you can adjust up and down, 13 and whatnot. Now, you'll see small adjustments in the field, if you see it brightened up just a little bit, that's just backlighting. We also have some other controls here.
(04:26)
Now, if that didn't do much for you when you're trying to adjust between bright spots and dark spots, let me put this back to default. There we go. We could go to a wide dynamic range, so let's go ahead and enable that Now, wide dynamic range helps adjust for dark spots. You'll notice how bright it just got right here. And now we have adjustments for it too, so we can adjust up and down. You'll notice how we got a lot more detail in the dark areas here by turning on the wide dynamic range. And if we go to extremes with it, it gives us an idea there's... Now it's brightened it up here even more, and yet we're still not washed out here, which is really good. So now let's default that. There we go. And you'll see that gives you a good example of how far it can actually adjust for dark areas. So if this is your area of concern and not this area over here, you want to turn on the wide dynamic range. And now we have a lot more detail down in this area here.
(05:36)
All right. Now let's go to white balance. You can manually adjust the white balance. This basically adjusts the colors. You'll notice that colors start to change here. And so if you've got a picture that's just a little bit off with its coloring, you can play with these color controls here and you can do some pretty strange things with it. There you go. And if you've got things out of whack, then you just go back to your default and it takes everything back to the default settings. There you go.
(06:08)
Shutter. Now we have shutter control on the system here. So what we can do is we can go to a manual shutter control and we can increase it, let's say to 120th. Now give it a moment to adjust itself. Now, you'll notice we see great detail in the dark area, but we gave something up. We're overexposed in this area here, so let's go back to default on that. There we go.
(06:39)
Defog mode, auto. Now, if the camera is in a high humidity area, the camera could, has a possibility of fogging up, and you can go into manual mode. Now automatic will automatically increase, within the parameters, it'll increase the temperature of the camera to burn off that excess moisture so that the fog goes away. But if it's not doing enough by itself, you can go to manual mode and here, you can adjust the level. The temperatures of the camera operate on it to burn off any excess moisture in the air so you don't have any fogging effects. We'll go back to default on that.
(07:24)
And there we are again. I did like the wide dynamic range turned on with this particular camera because we're seeing a lot more detail here. Now, let's take a look. Let's go to the picture. Okay. So now you can see with the adjustments we just made, we can see a lot better and a lot more detail in this area. We can see the plate very clearly, where it was dark before. And that's it. That is the basic image controls built into the ProVue NVRs video recorders.
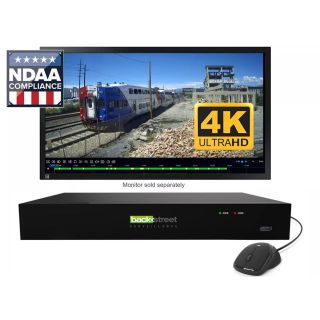
 (PRO4NVR) 4K NDAA Certified 4 IP Video Channel NVR
- - 4K Network Video Recorder
- - 4 Channel PoE IP Inputs
- - Human Detection & Alerts
- - License Plate ID & Capture
Special Price $279.00 Regular Price $399.00- (PRO8NVR) 4K NDAA Certified 8 IP Video Channel NVR
- - 4K Network Video Recorder
- - 8 Channel PoE IP Inputs
- - Human Detection & Alerts
- - License Plate ID & Capture
Special Price $375.00 Regular Price $499.00 - (PRO16NVR) 4K NDAA Certified 16 IP Video Channel NVR
- - 4K Network Video Recorder
- - 16 Channel PoE IP Inputs
- - Human Detection & Alerts
- - License Plate ID & Capture
Special Price $599.00 Regular Price $799.00 - (PRO32NVR) 4K NDAA Certified 32 IP Video Channel NVR
- - 4K Network Video Recorder
- - 32 Channel 16 PoE Inputs
- - Human Detection & Alerts
- - License Plate ID & Capture
Special Price $799.00 Regular Price $999.00 - (PRO64NVR) 4K NDAA Certified 64 IP Video Channel NVR
- - 4K Network Video Recorder
- - 64 Channel No PoE Inputs
- - Human Detection & Alerts
- - License Plate ID & Capture
Special Price $1,425.00 Regular Price $1,999.00