How to Wire Your Home For Security Cameras
 (00:14):
Today, we're pre-wiring a home for an IP based video surveillance system, also commonly known as a Cat5 or Cat6 system. The design is straightforward, the cameras are located at strategic locations, and then connected to a network video recorder using a single Cat5 or Cat6 cable. So, let's get started.
(00:35):
All right, let's talk a little bit about the tools that you'll need to pre-wire your home. Obviously, you got to have a drill. We use cordless drills. They work fine. You're going to need a wood bit. This is a one-inch wood bit. We like the longer ones. In case you got a couple of studs stacked on top of each other, you can just punch through it with one push. Now, you can use a three-quarter inch or one-inch bit. There are thinner bits, like the three-eighth inches. And you can pull a Cat5 or Cat6 cable through them, but we don't recommend them because it's so tight, it makes a 90-degree turn when the cable comes down, and it creates a stress point on the cable where it could cause problems down the road, especially if someone steps on it. When you use a wider hole, it gives a softer turn for the cables coming in, and it eliminates any pressure points on the cable. And okay, next, you're going to need something to cut the cables with.
(01:29)
We just got a pair of snips here. Electrical tape and a sharpie. And we'll show you there are two reasons for the electrical tape, and there's one reason for the Sharpie, and we'll talk about that in a minute. We use a staple gun. This is a wire staple gun. It uses the half-moon staples. And we use that so that we can keep cabling and our Cat5 and Cat6 cable out of the way of high voltage cables. And you want to do that because you want to eliminate crosstalk. And this is a good example right here. This electrician looks like he pre-wired the home for their network. I do not like the fact that you've got a data cable crossing a high voltage line like that. You could get bleed over and crosstalk, and it could cause noise into your line. So, we use a staple gun to keep the cable away from those kinds of potential problems, and we'll show you more detail about that in a minute.
(02:28)
You'll need a ladder. We recommend gloves, and that's really it to get going. So, we'll start going through and showing you some of the things that we do and some of the points that you want to pay attention to when you're pre-wiring your home. Hang on, hang on. Before we go any further, we got to get the paperwork out of the way. Go ahead and click the subscribe button right there on the corner, the red button right there. Okay, let's talk cable. First, let's talk about what type of cable that we're dealing with. And we'll start right at the basics and whether you want a box of cable or a spool of cable. Now, I like boxes of cable because you can pull it all day long. And it's not tying up. It's not twisting up. You got it made. Okay? The spools are a little harder because you've got to... You have to spool it off, so you've got to set something up so it will spin off as you go.
(03:23)
If you don't and you just try and unravel it, you'll end up with this as you're trying to pull and it makes a mess. So, if you do get a spool of cable, make sure that you use it so that it can unspool as you're pulling the cable. Okay? Now, let's talk about what kind of cable you should be putting in. First and foremost, Cat5 7, and 7 are fine. They all exceed the data requirements for security cameras, even 4K security cameras. You are not going to see a difference between Cat5 and Cat6 cables with a 4K camera. All you need to know is that cat5 cable, the maximum distance you want to go is 220 feet, Cat6 cable, is 300 feet. Those are the only things that you need to know. Don't spend extra money. Okay? Buy the middle cable, and this is why. If it's expensive, it's going to be riser cable or shielded cable, or plenum cable, and you don't need all those things.
(04:20)
Those are features for certain applications. You don't need them for homes. Now, the cheapest Cat6 cable you can find that looks like a great deal, please don't buy it, because right in the corner of the label, it's going to say CCA, and that stands for copper clad aluminum. You're buying aluminum conductors. They take aluminum, and they fuse a little bit of copper on the outside of the conductor so that it will transmit data, but it's garbage. You get a lot of crosstalk. You might have all kinds of performance problems. And you think you got a bad camera or MVR. The fact of the matter is you just got crappy cable. Go ahead. And when you go to buy your cable, just get Cat6E. The E is a structural cable. There's a little center, plastic center down the middle of the cable that separates the four pairs from each other.
(05:10)
That stops some of the crosstalk that you get, and it's a good quality cable. It's also a hundred percent copper, so just mentally, when you're buying Cat6 cable or Cat5, stay away from CCA. Okay, now let's talk about some tips on efficiently pulling cable. Now, when you're at the store and you're buying your cable and you need it. Let's say you got to pull five cameras. Do you buy one box of a thousand feet or two boxes of 500? My argument's going to be two boxes of 500, and here's why. A lot of times you have security cameras located in similar parts of the house. If you buy one box, you're going to make three runs. Don't do that. Buy three boxes and make one run. You can pull to the nearest camera, drop off one cable, and then continue on to the next and the next, and you're only making one run.
(06:00)
Now, there are a couple of points that you want to do if you're pulling multiple cables at the same time. We've got a spool of cable here, and we've got two boxes. The first thing we want to do is mark them so we don't get them confused. So right on this Cat6, I'm going to write one, and I'm going to write one somewhere over here. Okay? For this cable, I'm going with a two and a two. And this cable, I'm going with a three and a three. Okay. Now, once we get them over there, we come back, we cut them, and as soon as we cut it, we write two on the cable again, and now we know what cable's what, so we're not spending a whole bunch of time toning wires out to figure out which one's broken or which one doesn't work. Okay? Keeps it easy that way.
(06:47)
Now, here's an important tip when you're pulling. You bring the three cables together. You don't pull them just willy-nilly like this, because what'll happen, is they'll wrap around each other. You'll get halfway to the pool, and they'll be so wound up, they won't pull anymore. But just by taking them and putting all three together, we just tape them up real quick. Boom. There's your pull. Okay? This is another reason. You can see why you want a one-inch wood bit rather than a smaller bit. Now, we're ready to make our pull, and all the cables will pull at the same time. Okay, let's talk a little bit about camera placement and layout, and design. Now, on our website, we've got lots of detailed videos and information on where to locate cameras, what fields of view you're going to get, and the kind of do's and don't.
(07:41)
So, this is just a quick overview, but the first thing that we did is we took a picture of their plans, laid it out flat, took a picture from below, pulled it into a drawing program, and then just overlaid camera locations and indicated the fields of view on it. This is what the technician uses on-site, make sure it gets the cameras in the right locations. It's simple and it works great. Now, let's talk about the camera locations. Now with this application, we were able to use a nice little vandal dome, a 4K vandal dome with a wide-angle lens, because none of the viewing distances are beyond 60 feet. And even with the 4K camera, when you're going past 60 feet, you really want a zoom lens so you can adjust the field of view to get the detail you want. But up close, you can use a wide-angle lens, which is a 2.8 or a 3.6-millimeter lens.
(08:30)
Now, 2.8 opens up at 110 degrees field of view, and at about 40 feet out, you get this fisheye view. So, it's only good for up close porches and things like that. The natural view is a 3.6-millimeter lens. That opens it up at a 90-degree field of view. That doesn't give you the bubble or the wrapping effect at 40 feet the way a 2.8 does. So, we like to use 3.6s when we're doing surveillance around a home. It just gives it a more natural view. Now, I'm going to show you how to boresight a security camera, and it's really high tech and it's a secret that all the pros use, and you're about to get it here today, and here it is. Since the camera, the 3.6-millimeter camera opens up at a 90-degree field of view. You just hold your arms out at 90 degrees, stand right below where you're going to mount the camera, and look down your arms.
(09:25)
That's what the camera's going to see. Maybe I want to see that. What am I missing? Maybe I'm coming over here and I'm doing this. But as long as I keep my arms out at 90 degrees, I'm going to know exactly what the camera's going to see and what it's not. Now, usually, you'll find cameras at the corner of a home. That's because of this natural 90-degree field of view. You can go from the wall all the way out 90 degrees. I've seen some rookie mistakes where people will install a security camera in the middle of a wall. So, now the camera's looking like this, right? Okay, well, that's great. You have a field of view here. But guess what? You got a 45-degree blind spot here, and you got a 45-degree blind spot here. So while this camera's sitting here staring at all of this, I could walk right up to the side of it and disable it and you wouldn't see a thing.
(10:14)
That's why you'll find a lot of cameras on the corners of homes, is because you cover as much as you can, but you can't come up from this way. You could come up behind it this way, but if you locate the next camera on that corner, that camera is watching this camera's back. And now if someone does mess with this camera, that camera documents it and you know what happened. Okay, a little word of advice on just finishing up and how you should leave your cables once. This is what electricians do. They'll pull the Cat6 cable in. They'll put up a single gang electrical box, and they'll leave your cable in there. So, it looks clean, and then the soffit people know to come butt up to it, and you've got a nice recessed box in here. It sounds good, and it looks good until you try and mount a security camera.
(11:07)
Here's reality, nobody, and I mean nobody makes a security camera that fits a single gang electrical box. They all have their own custom footprint, and so it causes a problem. You got this beautiful thing roughed in. Now you got this box, but you can't mount the camera to it. And so when you do it this way, you end up with two choices. You have to go get a blank cover for the single gang electrical box, drill a hole through it, bring the cable out, connect the camera, push the cable up into the box, and then use self-tapping screws to mount the camera to the blank cover. It's kind of a lot of work, and it doesn't look too good when it's finished. Your other option is why we have our M5 security mount. The mount is designed so that the holes do match a single gang and a double gang electrical box. So, you could use our mount to mount to it right there, but again, it's just one more mount that doesn't really seem to be needed.
(12:07)
It drops the camera down lower, so now you've got the mount and the camera, and so now it's becoming more noticeable. It looks much better if you have a small camera mounted to your soffit. So, let's explain how we do it and eliminate this so you don't run into a problem when you're ready to mount the camera. Okay. This is how we prefer to do it. Now, it does take a little communication with the soffit people, but it works out way better, and you save a lot of time. We take the cable and staple it to the nearest joist where we want the camera to be located. And we throw a tie wrap on it so it looks nice, and it just sits this way and tell the soffit people to come in and we talk with them and say, "Look right where the cable is. Please just drill a one-inch hole to the side of the beam and bring our cable out." That's it.
(12:59) So, they'll run their soffit over, they'll drill a quick hole, bring the cable out, and they just keep going. It's that simple. So now, we've got the cable coming out of the soffit right along here, and now we can work with it, and we want it right next to the joist right here because the security camera, we use two-inch wood screws. We put the fitting on the cable, we plug the camera in, we push all the cable back up into the soffit, and then the camera's base just you with wood screws, screws into this joist with two-inch long wood screws, and it holds it there forever. It won't move. It'll be there after the house is torn down. Let's put it that way.
(13:43)
That way, you just eliminated the box and the extra effort and everything else with a single gang electrical box, which we wouldn't recommend. This way, it looks a lot nicer. The camera mounts right over the hole, and you have this natural mounting base right here for the camera. Works out great. Okay, this is a good example of one of the don'ts. And it's just a precaution, but it may make life easier for you. So, we've got a Cat5 cable the electrician ran and a coax cable right here. But you can see the first thing they did is they put it right across a joist right here on this two-by-four. It's a natural place for another contractor to step. And there are only 23 gauge conductors in here. If you pinch one of them and break it, you're going to be chasing ghosts forever because you're going to think your security camera's bad. Then you're going to check your video recorder.
(14:37)
And then after you finally are tired of all of that, you're going to throw a tester on this cable and find out one of the conductors is bad and have to pull a whole new cable. So, let's keep the cables up and staple to Joyce and things where people don't step. That way, you'll never have a problem. Here's the other don't do it. He's got a cross in the 120-volt power wire. Let's not do that because the crosstalk that induces on this cable could cause you problems down the road. You may never figure it out. Okay, we want to point out another don't, and this is it right here. We did this on purpose, but we ran multiple cables across this truss connector right here, this big metal plate, and it's very sharp. And the problem is... You'll see this a lot in construction. It's a natural V right here where the cables settle into. The problem is the weight of the cables coming down over time could cut into the cable and cause you problems. And so these are the kinds of problems that we want to stay away from.
(15:35)
And there's a very simple solution here, is all we do... I just took a tie wrap right here and stapled it to the stud, we bring the cables up and we just tie wrap it up above that plate so it's not a problem anymore. Now, we lose some slack here so we can run more cables through this and stay away from this plate. Now, that plate has no chance of cutting into the cables, and we've got a good install. All right. Now, we've got two one-inch holes right through the top of the stud here, so we'll easily be able to bring all 13 camera cable wires down. We'll run them along this stud and bring them out a finished plate at the bottom.
(16:24)
Okay, so now we've brought our cables down the inside of this stud. We've stayed away from the line so that we don't have any crosstalk. We put a rough in ring right here and brought our cables out. Now, the drywall, when they put the drywall up, they'll just etch around this and that'll become like a regular electrical outlet, except it's just our cables coming out. And then we use a finished plate like this. We get these at Home Depot. They're a couple of bucks. They'll let you bring multiple cables through the hole there, and so we can bring all 13 cables through here and have a nice finished look on the wall.
(17:17)
Now, we're not terminating the cables right here and then using patch cords to come up to the video recorder. We think it's a bad idea because all you're doing is introducing more splice points where you could have a problem with the connection. So, we prefer to keep the cables intact and bring them. There'll be a desk right here, a video recorder will be right here, and these will come right into the back of the video recorder and terminate right in. It eliminated the splice point and guaranteed good operation. Okay, that's a wrap for us. Subscribe to our YouTube channel so that you can see us terminating and mounting the cameras. And we hope the information was helpful to you. If you have any questions, shoot us a line. We'll respond back and give you the best advice we got. Thanks a lot.
 (Pro60VB) 3K Turret Vandal Dome, 3.6mm Wide Angle
- - Active Deterrence, 2-way Audio
- - Siren & Alarm Lights
- - Wide Angle Lens 3.6mm
- - 60ft COLOR Night Vision
Special Price $156.00 Regular Price $229.00- (Pro90-4K) 4K Outdoor Security Camera with Audio
- - Indoor/Outdoor Wall or Ceiling
- - Audio, Built-in Microphone
- - License Plate ID & Capture
- - 90ft COLOR Night Vision
Special Price $212.00 Regular Price $299.00 - (Pro90D-4K) 4K Turret Vandal Dome, Consumers #1 Choice
- - Indoor/Outdoor Wall or Ceiling
- - Audio - Built-in Microphone
- - License Plate ID & Capture
- - 90ft COLOR Night Vision
Special Price $212.00 Regular Price $299.00 - (Pro90D-4KG) Black 4K Vandal Dome, Consumers #1 Choice
- - Indoor/Outdoor Wall or Ceiling
- - Audio - Built-in Microphone
- - License Plate ID & Capture
- - 90ft COLOR Night Vision
Special Price $212.00 Regular Price $299.00 - (Pro75MZ) 4K Turret Vandal Dome, Motorized Zoom
- - Indoor/Outdoor Vandal Dome
- - Motorized Zoom Lens
- - Wall or Ceiling Mount
- - 75ft COLOR Night Vision
Special Price $244.00 Regular Price $329.00 - (PTZ-Dot) Mini Indoor or Outdoor Pan-Tilt-Zoom Security Camera
- - Indoor/Outdoor Wall or Ceiling
- - 3K, Built-in PoE
- - 3x Motorized Zoom Lens
- - 90ft COLOR Night Vision
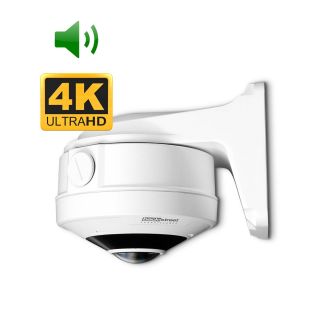
Special Price $299.00 Regular Price $399.00 - (cs360-4k-wall) 360 Degree View, Wall Mount, 2-way Audio
- - Indoor/Outdoor, Wall Mount
- - 360° Field of View
- - All Advanced AI Features
- - 33ft COLOR Night Vision
Special Price $1,036.00 Regular Price $1,363.00