
You Choose!
Below you will find proven advice on the basics of designing an effective home video surveillance system. If you would like to have an expert check your design, or provide a design based on your input, feel free to schedule a design appointment below. We'll be glad to review your ideas and make any suggestion we feel would add value to your system. It's simple, just pick a day and open time slot on the calendar below:
Book an appointment during business hours or even after hours
Camera Locations
The following are suggestions, they may not apply to every installation. Before you start installing, walk the areas where you plan to locate the cameras. If possible, stand at each camera's location. Pay attention to what you see. Can you see everything you want to at that location? Whatever you see, the camera will see. If the answer is no or if there is an obvious blind spot, look for a better location for the camera.
Indoor cameras can be installed just about anywhere. Wall or ceiling mounted is fine. Typically, cameras are installed in a corner of the room opposite from the entry point. This usually provides the best coverage and requires anyone who would want to tamper with the camera to be recorded before they have access to the camera. The best height for a camera is usually around the 10ft level or higher. This is high enough to keep people from accessing the camera unless they have a ladder. Also, understand if you aim a camera at large exterior windows or an exterior door, the view may be somewhat limited during bright or sunny days. All cameras are equipped with an auto iris and they work extremely well, but they still have their limits and will have to adjust to either the light level inside or the light level outside. Whichever one it adjusts to, the other will likely be less than optimal.
So where should you locate your security cameras?
Below are a few of the most common viewing patterns. Each has benefits and possibly some draw backs. Your application will dictate which design is most effective.
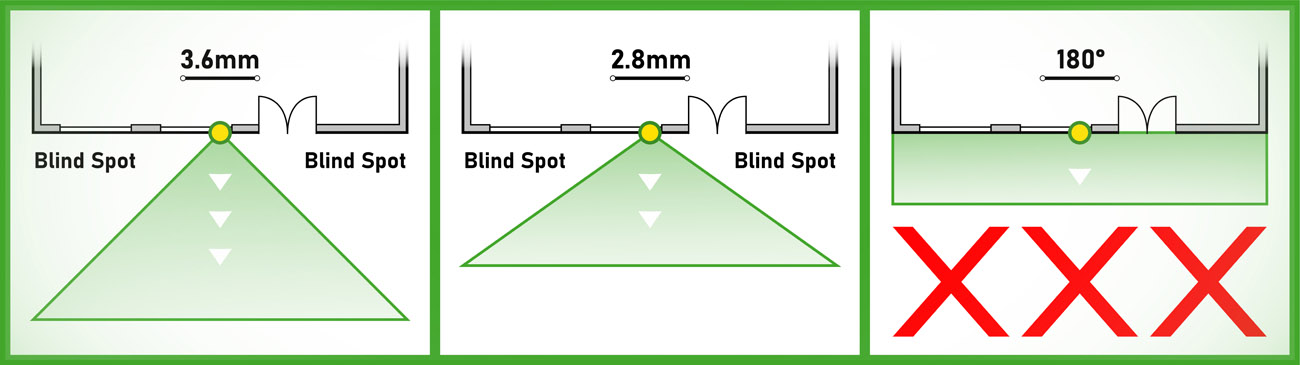
Mid Wall Pattern
Mounting a camera mid wall and adjusting its view perpendicular to the wall. This location can be useful for certain applications but is seldom used by security professionals, simply because it creates a blind spot on each side of the camera. A 3.6mm lens provides the widest viewing angle without distorting the image. There are 180 degree cameras on the market but they distort the video so badly that the video is useless at distance. We do not recommend using any lens wider than a 2.8mm, which provides a viewing angle of 110 degrees. Still, with such a wide viewing angle, do not expect great clarity beyond 40 feet (there is a warping or bubble effect past 40 feet). Because of this, a 2.8mm lens should be used for up close applications - such as a porch or any location where you desire a very wide angle view but do not require great detail at distance.
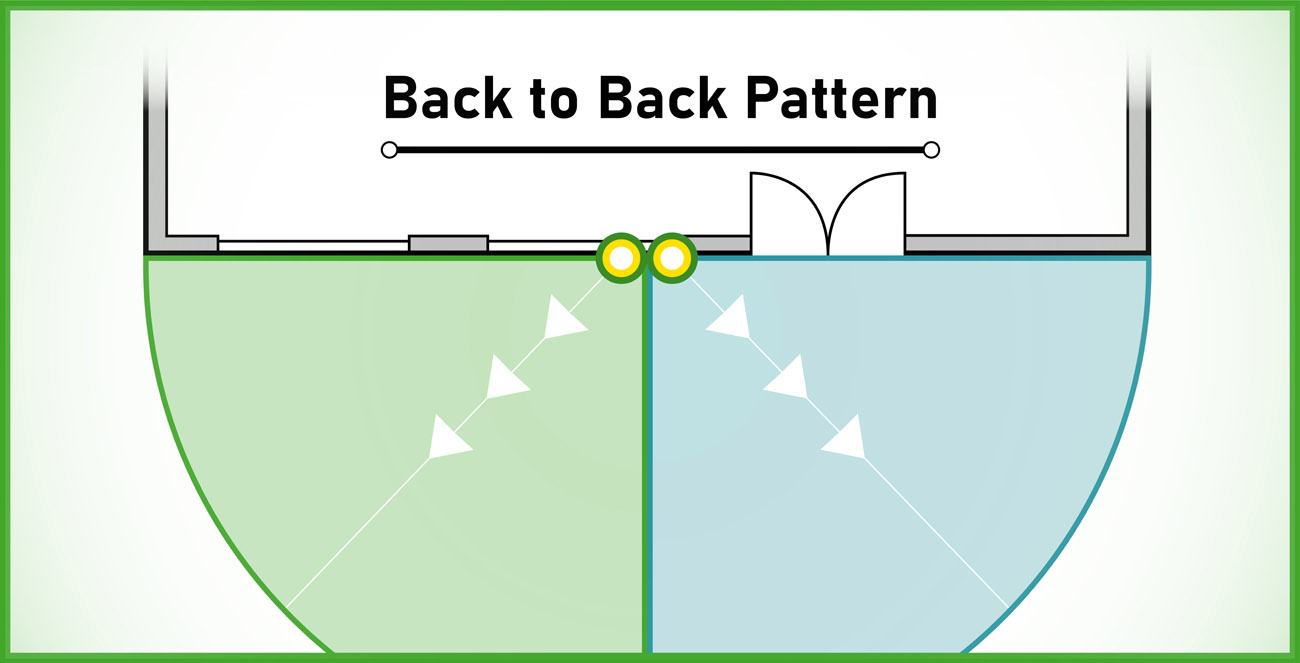
Back to Back Pattern
Place two cameras back to back mid wall. This design eliminates the blind spots that can occur when using one camera mid wall.
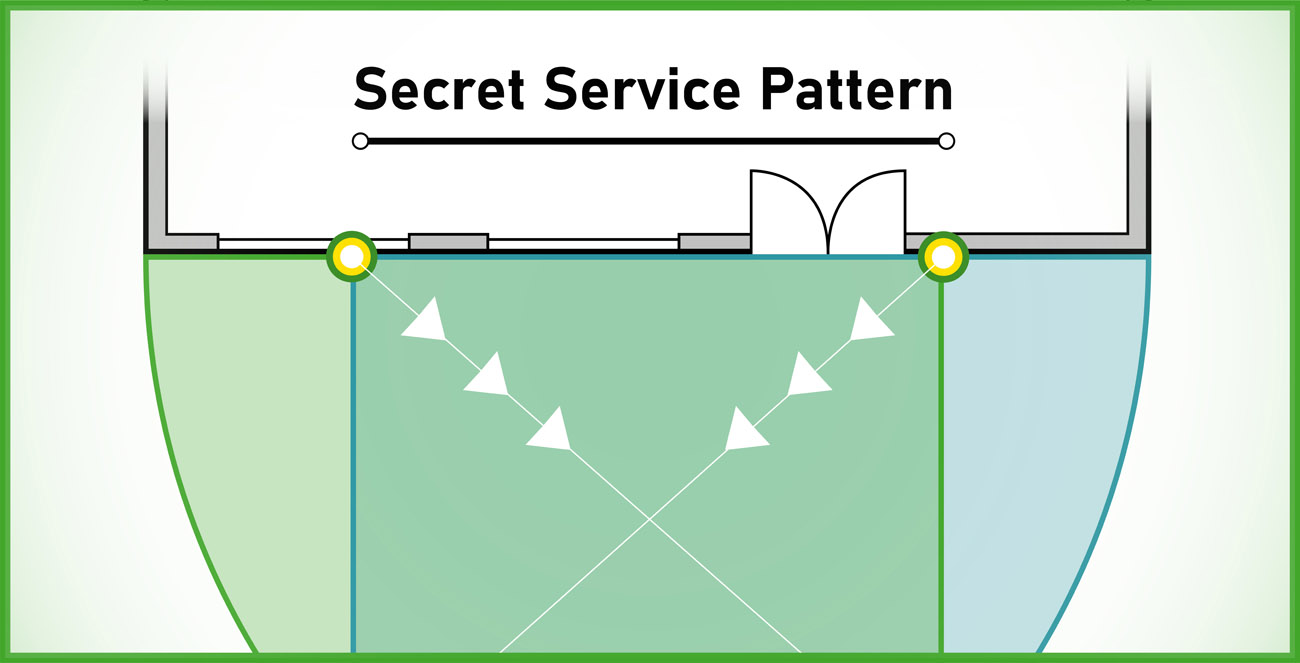
Secret Service Pattern
Two cameras are installed on the same wall, separated by 15-20 feet and aimed towards each other. Basically, the cameras are watching each other’s back so that neither camera can be disabled without the perpetrator being seen. This design works well with both fixed view and zoom lens cameras.
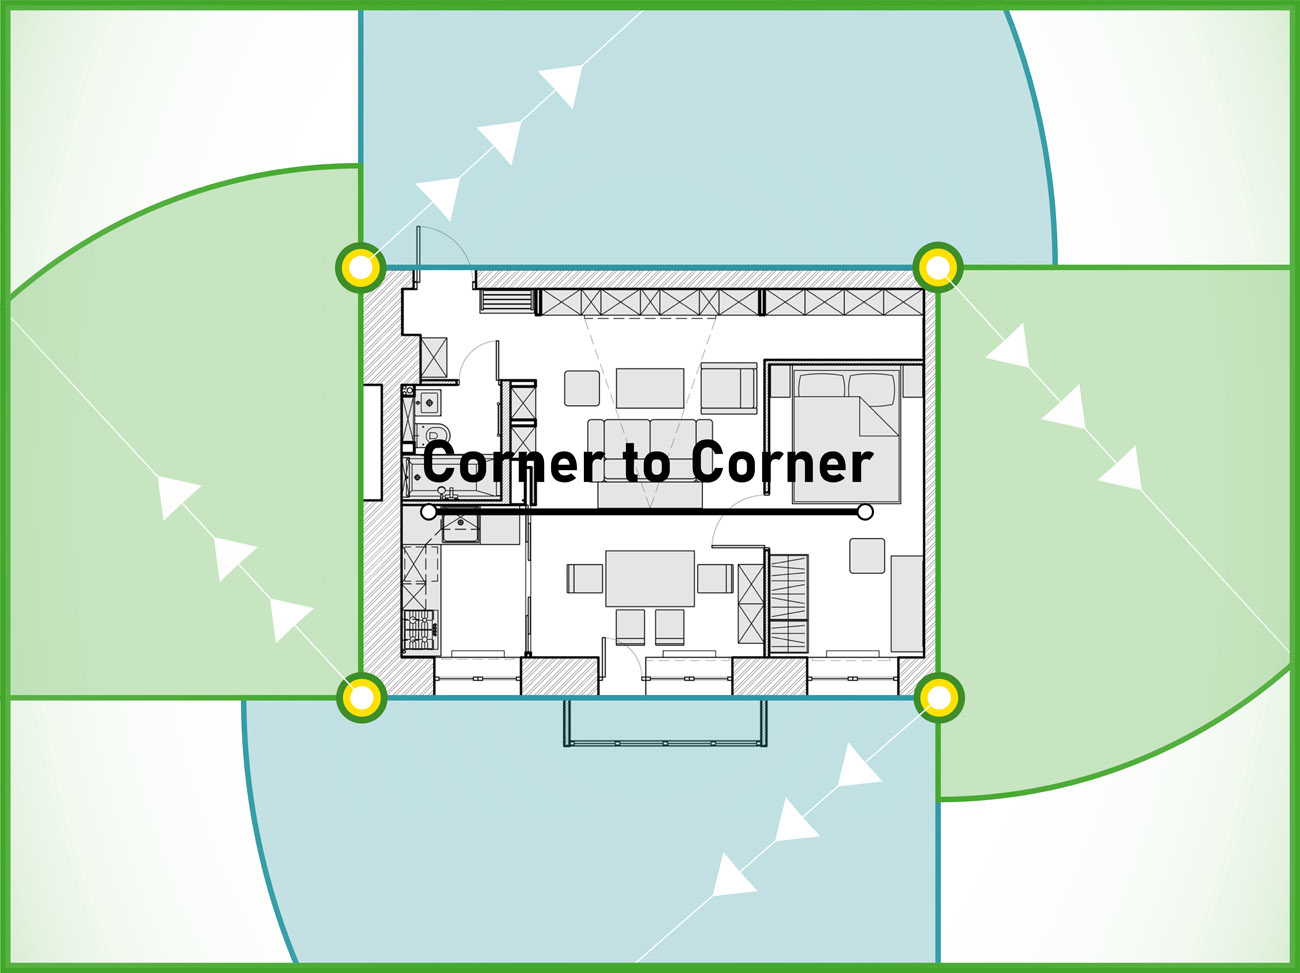
Corner to Corner
This design is the most common and provides several benefits. It makes the most of each camera's viewing capability and covers 100% of the perimeter. When the cameras are placed as the diagram below indicates, all blind spots are eliminated and the cameras cannot be vandalized without the perpetrator being recorded by another camera.
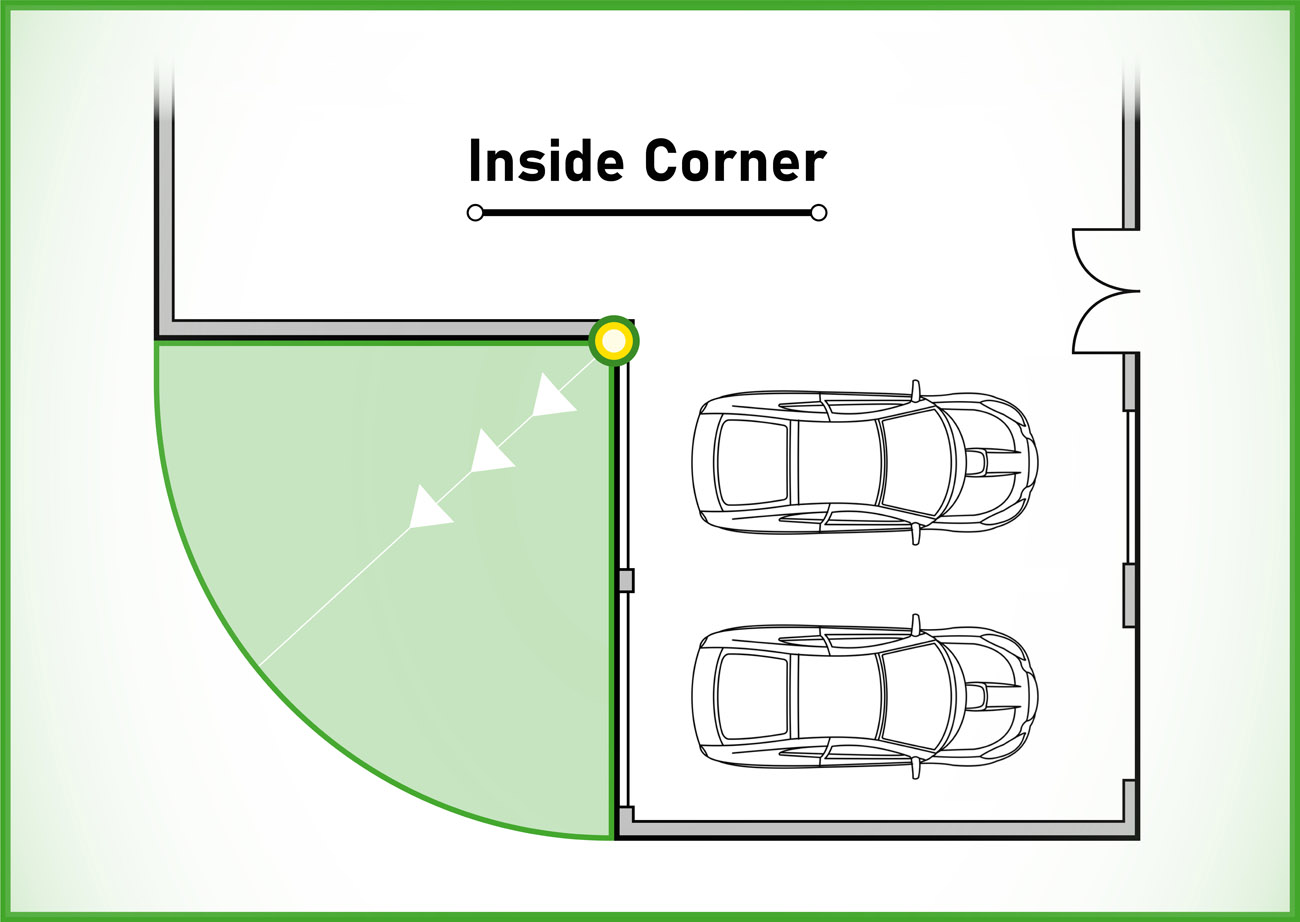
Inside Corner
This pattern is simple and very effective. Because a 3.6mm lens provides a 90 degree field of view, it is perfect for an inside corner. When using this method, the camera cannot be vandalized and the corner is covered wall to wall.
Subscribe to our Youtube channel and
learn how the experts get it right the first time!
26,000 Subscribers - 10,000,000 Views - 127,000 Hours of Watch Time

Note: Less than half of residential systems have indoor cameras. Properly placing cameras outside on the perimeter of your home can be just as effective as indoor cameras without giving up privacy.
Outdoor cameras follow the same basic guidelines as indoor cameras. While they are designed to handle weather, the elements and can operate in extreme conditions, it is still preferable to protect them if possible as they will certainly last longer. If you have the options of mounting the camera directly on the roof, where it will be taking the full brunt of the sun, rain and wind - or on the side of a building where it is somewhat sheltered, always choose the side of the building.
Don't ask one camera to do the work of two!
The most common mistake customers make when locating cameras is trying to get one camera to do the work of two. We all want to get the most out of each camera, but if you go too thin with coverage, you may be throwing your money away. We have all seen video of some crime being committed, but due to the lack of detail that the video provides, the cuprite cannot be identified. The lesson learned is “Be conservative with the coverage you expect each camera to provide”. As a general rule, each camera should not be expected to view more than 30-40 feet horizontally at the preferred viewing distance.
Typical Residential Camera Placement
Cameras located at the corners of the home in a trap surveillance pattern is common practice and is very effective. Trap surveillance is the most cost effective form of indoor surveillance. Cameras are strategically placed so a person cannot move from one area of the home to another without being seen and recorded. This design reduces the number of cameras needed to effectively protect the inside of a home, while keeping bedrooms and baths private.


Thank you for contributing!
We would love to hear your point of view, thoughts or comments. Post a reply below or share this post on social media, then send us a link to the post - sales@backstreetsurveillance.com. We'll send you a special discount code giving you maximum savings at checkout. As always, your email is protected and only used to send the discount code.

